

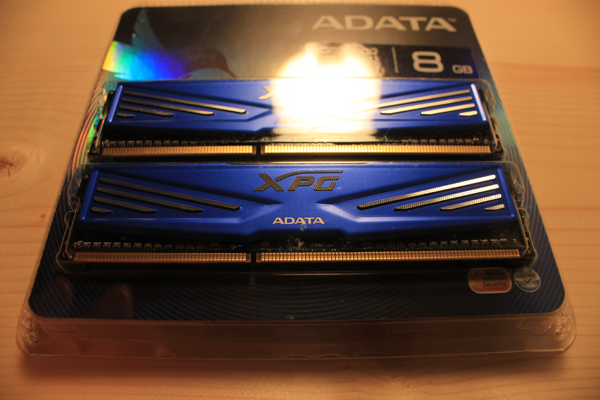
RAM is what started all of this. My HP isn’t upgradeable, and I didn’t want to make that mistake again – – what a rip! My current computer is maxed out at 4GB of RAM, and I’m doubling that, sticking with 8 for now, which will DEFINITELY be upgradeable in the future.
Innit it purdy? Looks like a racecar!
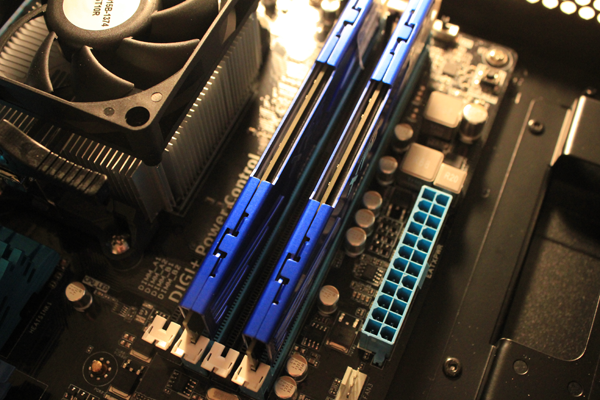
Now to get that sucker open. Why do they torture me like this? Haven’t people accidentally slit their wrists on these damn things trying to get them open? They’re dangerous!
Had a tiny bit of trouble installing the RAM when I kept trying to unlock the left side like the video. On this board only one side locks ;p
I had been dinking around with all this for quite a few hours (see “Part 1”), and it was time to decide if I wanted to go game or do something else, or to keep working on the computer. Since the video card was on back order, and my parts guy forgot to order an operating system, I wasn’t going to have it up today anyway, so I decided to go ahead and close the case and come back the next day to start routing cables.
Took a break that next day to lay down some audio tracks for an upcoming Halo:CE campaign mod . It took FOREVER, since my current computer is dying. I was also rendering a game night from the night before, which had been rendering ALL NIGHT LONG (did I mention I needed a new computer?), and still had several hours to go. But I didn’t know the deadline on the audio files, *and* I have a tendency to forget about stuff if I don’t just get on it, so I had to get them done.
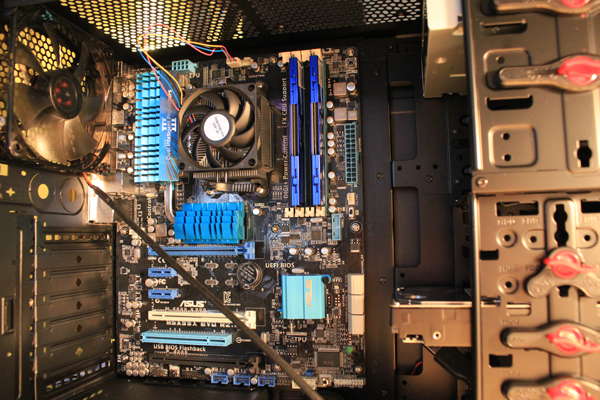
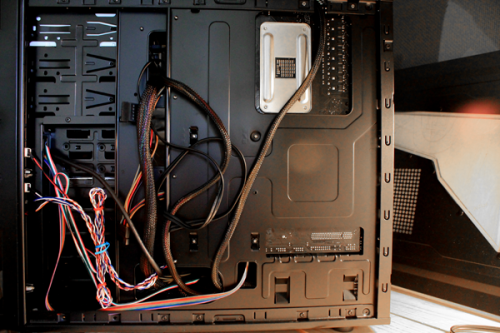
Back at lunchtime the day after to route some cables, using an article at PCWorld.com for reference, “How to Organize Your PC Cables” by Loyd Case. This is what it looks like inside the case before I get started.
The images for Step #1 in “How to Organize Your PC Cables” didn’t do diddly-squat for the uninitiated, so I’m off to go study my cables.
I take the other panel off my case to route cables behind the motherboard. The “Organize” guide explains the process for routing back there, but there are no photos of the end plugs: apparently I’m supposed to know which two of these are power cords? O.o
Referring to the motherboard manual, I get it sorted out and plug them into the motherboard where they belong.
The case came with black zip ties, but the author of “How to Organize” says zip ties are for nubs (my words, not his), so I round up my collection of black bread ties (I gotta thing for them – hey, don’t read too much into it) and I’m ready to start securing and plugging in the rest of the wires.
Whu…? Dangit! No one warned me, it wasn’t in any of the literature: apparently one of those cables comes through from *behind* the motherboard, like literally, and had to be slotted through FIRST, before the motherboard was secured down. Now I have to unscrew the motherboard out to thread the cable through. Frickin’ great. What a P.I.A. At least I know what I’m doing this time around.
Thing is, I already had the other power cable plugged into the motherboard and I’ve forgotten about it before I go to take the motherboard out. Now I have a loose, fragile motherboard, and I’m trying to unplug a tight cable from it with no leverage.
I need more hands.
After getting the power cable routed through and the motherboard back in place, consulting both my case manual and my motherboard manual, wires start finding their homes.
One plugin doesn’t match the motherboard, the systems warning, and I have to go make a post at TomsHardware forums to get advice. I’ll come back to that later.
Looked up power cables to double-check that the plugs were meant to be used for more than one device per cable, since it didn’t say anywhere and this was another step all the videos and “how-to” posts assumed was self-explanatory, and once I got the a-ok on that, plugged in my hard drive and DVD drive to the power source.
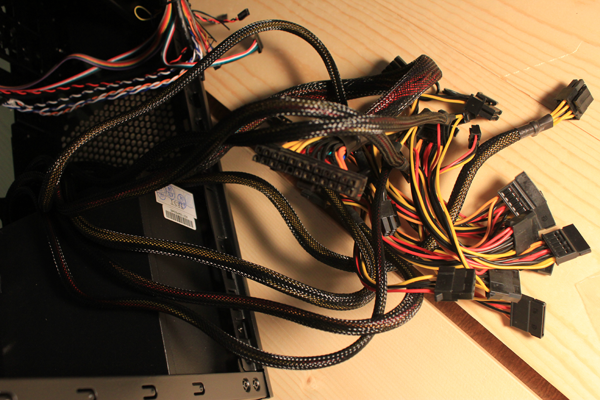
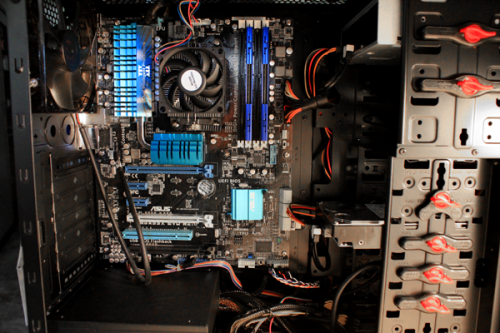
Here is what all my cables look like when I’m done routing and securing them:
Here it was time to stop for the day. “I’ll probably get to booting it up tomorrow” I thought with some excitement and not just a little dread.
***
A week later…
“It’s been a week” I say to myself, “what am I waiting for?!” Granted it was a very busy week, AND I was sick with angry tonsils for a couple of the days, but I could sense something was talking me out of working on the computer.
Oh yeah, did I mention my car also broke down?
But it wasn’t all that, it wasn’t even my newest art project that was taking over the time I usually use searching for game news.
No, I was terrified.
Terrified that when I finally plugged the damn thing in there’d be a crackle, a pop, and telltale smoke, letting me know I’d made some horrendous error that doomed the whole lot to the scrap pile.
“But, come on now,” I told myself, “you’ve been careful, you’ve followed manuals and watched videos – – what possibly could you have done that would result in disaster?”
Famous last words, right?
And so I start my Saturday off replacing those motherboard screws with the right ones, and figuring out where I’m going to set up to pull off this mysterious, first booting up process.
I have one monitor. I don’t know if I was planning on using it for both, or what, but my computer desk isn’t really big enough for both computers. I just figured I’d figure all that out when I got to it. So to do the test boot, I’ll either need to unplug the monitor from the current computer and my 360 and bring it over to the new computer and project table, or make space over by my current setup.
I start off by looking at the back of the new computer again. Where would I plug in the monitor? I don’t even know what kind of cable I’m going to need or if I even have one.
Um… yeah… where DO I plug in the monitor?

Back to the motherboard user manual for some clues. But I didn’t find answers there. I couldn’t find answers anywhere. Were monitors now plugging in via USB? I wouldn’t be surprised, but it seemed like it would say it somewhere. Were one of those plugins an HDMI? Nope, didn’t look like it.
Back to TomsHardware to post on the forums, where some snarky forum goer insulted my intelligence and the helpful kid who was trying to problem solve it with me. Some people, I tell ya, they must not have anything better to do for amusement.
Turns out, there is no way to connect to a monitor until my graphics card comes in.
Once again, things simply aren’t in my control. This computer project is taking up the table space I need for building Solace, so that’s pretty much on hold, too. Good thing I’ve been practicing patience… O.O
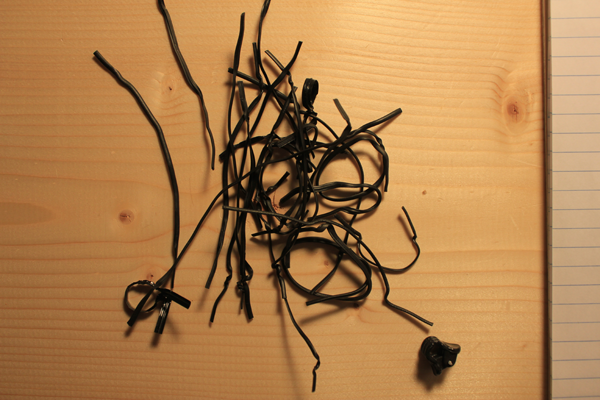
Oh yeah, one more thing: you know when you take something apart, and when you put it back together there’s these parts that you have no idea where they came from but everything seems to be working so you’re not going to worry about it? Well, this kinda reminds me of that. What the heck is this?:
This concludes Part 2 of “Building My First PC”. Next up: DAS BOOT!
~CHa0s
—————————————————
See the Newegg videos and a link to Toms Hardware’s “Step by Step Guide to Building a PC” post below, which I plan to include in all “My First PC Build” posts for reference.
Toms Harware: Step-by-Step Guide to Building a PC
– http://www.tomshardware.co.uk/forum/274745-31-step-step-guide-building
Newegg TV: How to Build a Computer:
Want to be notified when Halo Diehards has a new post? Subscribe to our Twitter, @HaloDiehards!
7 comments for “Building my First PC – Part 2: MEMORY!”